Building Cross-platform C++ GMP library with VCPKG, CMake and Bazel: Lessons Learned
Building a cross-platform application on C++ is quite challenging, specially when thirdparty package dependencies are involved. This article briefly discusses the issues faced when building the GNU MP BigNum Library on Windows, Linux and MacOS-OSX.
To experiment with different build scenarios, a repo was created on github, called manydeps/manydeps-gmp. By visiting such repo, one can see that tests are fully passing for setups involving CMake and Bazel build systems, so as for VCPKG package manager (will briefly discuss these technologies later).

CMake and Bazel build systems
C++ is a compiled language, so we need some compiler and some build system to orchestrate the integration of our software and thirdparty software. The CMake is a classic package system where you create a CMakeLists.txt and it defines all steps (as build recipe) to build your software together with your dependencies. For simple projects, CMake works very fine, but things begin to break when you need more and more complicated dependencies. So, for more complicated projects, I use Bazel, which is quite simple to configure and very safe for complex projects, as it is based on declarative Skylark language (syntax similar to python).
C++ Package Managers
There are several package managers for C++ (so as native packages provided by each operating system), all of them struggling with specific difficulties. We consider the Conan.io and VCPKG.io package managers. I have successfully used Conan in linux applications, but due to better support of Microsoft for windows applications on VCPKG, we will consider VCPKG in this article.
The VCPKG is very simple to use, on general the main steps are:
- Add vcpkg as a submodule in your project (I personally link to put it under some tools/ folder): git submodule add https://github.com/Microsoft/vcpkg.git tools/vcpkg
- Execute the bootstrap script (on windows it has .bat extension for CMD, while it is .sh on Linux and Mac): ./tools/vcpkg/bootstrap-vcpkg.sh
- Integrate with your build system: vcpkg integrate install
- Finally, create a manifest vcpkg.json and install the packages you want: vcpkg install
Specially for Windows, it is required to specify the architecture and package type, so we do the following: vcpkg install --triplet=x64-windows-static . For linux, it can be --triplet=x64-linux and for mac --triplet=x64-osx .
The package manifest vcpkg.json is very simple, just informing package names, versions and target operating systems for each package. In our experiment with GMP, we found that original gmp library is not good to use on windows, so some people (like wbhart/mpir and BrianGladman/mpir ) created an MPIR variant of GMP, focused on Windows.
So this is my vcpkg.json file:
{
    "$schema": "https://raw.githubusercontent.com/microsoft/vcpkg-tool/main/docs/vcpkg.schema.json",
    "builtin-baseline": "962e5e39f8a25f42522f51fffc574e05a3efd26b",
    "dependencies": [
        {
            "name": "mpir",
            "platform": "windows & x64"
        },
        {
            "name": "gmp",
            "platform": "!windows"
        }
    ]
}
Beware of static libraries in Windows
During this experiment, I found our that libraries are very complicated on Windows! On linux, we only have Static Libraries (extension .a) and Shared Libraries (extension .so), but on Windows, besides the classic shared library (extension .dll called /LD type), there are (at least) two types of static libraries (all with .lib extension): /MD type and / MT type.
So, I learned (in the hard way), that we always need to check the type of a static library in windows, before linking them! We check with the following two commands (consider a file named library.lib):
- First, list all .obj files from the static library: lib /list mylibrary.lib
- Second, dump the linker details from the static library: dumpbin /directives mylibrary.lib
If the result is a bunch of .obj and a bunch of references to LIBCMT, then you have a /MT library.
   Linker Directives
   -----------------
   /DEFAULTLIB:LIBCMT
   /DEFAULTLIB:OLDNAMES
Otherwise, you may have a /MD library, linked against MSVCRT (or you may have Debug versions of these two, like LIBCMTD for /MTd or even MSVCRTD for /MDd). And you should NEVER mix different types together!
This is a complete madness, since we are just talking about static libraries… Anyway, errors are very real, so if you meet one of these errors below, be scared and fix this issue right away:
cl : Command line warning D9025 : overriding '/MD' with '/MT'
LINK : warning LNK4098: defaultlib 'LIBCMT' conflicts with use of other libs; use /NODEFAULTLIB:library
On MacOS, the static library seems to be .a(as in linux), but it seems to exist two types of Dynamic Libraries: one is .so (as in linux) and a .dylib It seems that people prefer to use .dylib on macos/osx, and I haven’t found any issue with that.
Installing GMP or MPIR
So, we have two ways of installing the GMP or its windows counterpart MPIR: using package manager or manually building them. We explore the two alternatives.
VCPKG install GMP or MPIR
The install with vcpkg on windows, just configure your manifest vcpkg.json and perform some vcpkg install --triplet=x64-windows-static , and then find the library under some folder named tools/vcpkg/packages/mpir_x64-windows-static . I don’t know why, but sometimes it puts files in a local folder named vcpkg_installed/ or even build/vcpkg_installed (specially when using the CMake build system). In any case, find the correct location (that can also be mpir_x64-windows). In my case, the GMP package fails to build on Windows, so I really need to use MPIR. On MacOS, the installation vcpkg install --triplet=x64-osx fails, so I could not use VCPKG to install GMP for MacOS (I needed to build it manually). On linux it installs correctly with vcpkg or even conan.
Manual build GMP or MPIR
To build GMP or linux or mac, just open some decent Shell and execute the commands provided by GMP team (download gmp-6.3.0.tar.xz and put on thirdparty/ folder):
cd thirdparty
tar -xvf gmp-6.3.0.tar.xz
mv gmp-6.3.0 gmp
cd gmp/
./configure --enable-cxx
make
make check
Remember to execute make check as errors can really occur! If it passes the check, then verify where the library is located, typically thirdparty/gmp/.libs/libgmp.a (for linux) and thirdparty/gmp/.libs/libgmp.dylib (for mac).
On windows, download some MPIR fork and build them with Windows-like instructions (run over a CMD considering Visual Studio 2022):
git submodule add https://github.com/BrianGladman/mpir thirdparty/mpir
cd .\thirdparty\mpir\msvc\vs22\
cmd /c msbuild.bat gc LIB x64 Release
echo "CHECKING lib type (EXPECTED LIBCMT or /MT)"
lib /list thirdparty\mpir\lib\x64\Release\mpir.lib
dumpbin /directives thirdparty\mpir\lib\x64\Release\mpir.lib
All these steps finished, you will have some Static Library for GMP (or MPIR).
Now it’s time to build some example on CMake or Bazel!
Building example using GMP static library
Now we build a demo application for GMP using CMake or Bazel.
Demo with CMake
To integrate the vcpkg installation with a CMakeLists.txt, you need to integrate the vcpkg toolchain with CMake, by using a CMakePresets.json file:
{
    "version": 3,
    "configurePresets": [
        {
            "name": "windows-base",
            "hidden": true,
            "generator": "Ninja",
            "cacheVariables": {
                "CMAKE_C_COMPILER": "cl.exe",
                "CMAKE_CXX_COMPILER": "cl.exe"
            },
            "condition": {
                "type": "equals",
                "lhs": "${hostSystemName}",
                "rhs": "Windows"
            }
        },
        {
            "name": "win-x64-debug",
            "displayName": "x64 Debug",
            "inherits": "windows-base",
            "binaryDir": "${sourceDir}/build/debug",
            "installDir": "${sourceDir}/build/debug/install",
            "architecture": {
                "value": "x64",
                "strategy": "external"
            },
            "toolchainFile": "${sourceDir}/tools/vcpkg/scripts/buildsystems/vcpkg.cmake",
            "cacheVariables": {
                "CMAKE_BUILD_TYPE": "Debug"
            }
        },
        {
            "name": "win-x64-release",
            "displayName": "x64 Release",
            "inherits": "win-x64-debug",
            "binaryDir": "${sourceDir}/build",
            "installDir": "${sourceDir}/build/install",
            "toolchainFile": "${sourceDir}/tools/vcpkg/scripts/buildsystems/vcpkg.cmake",
            "cacheVariables": {
                "CMAKE_BUILD_TYPE": "Release"
            }
        },
        {
            "name": "linux-debug",
            "displayName": "Linux Debug",
            "generator": "Ninja",
            "binaryDir": "${sourceDir}/build/debug",
            "installDir": "${sourceDir}/build/debug/install",
            "toolchainFile": "${sourceDir}/tools/vcpkg/scripts/buildsystems/vcpkg.cmake",
            "cacheVariables": {
                "CMAKE_BUILD_TYPE": "Debug"
            },
            "condition": {
                "type": "equals",
                "lhs": "${hostSystemName}",
                "rhs": "Linux"
            },
            "vendor": {
                "microsoft.com/VisualStudioRemoteSettings/CMake/1.0": {
                    "sourceDir": "$env{HOME}/.vs/$ms{projectDirName}"
                }
            }
        },
        {
            "name": "linux-release",
            "displayName": "Linux Release",
            "generator": "Ninja",
            "binaryDir": "${sourceDir}/build",
            "installDir": "${sourceDir}/build/install",
            "toolchainFile": "${sourceDir}/tools/vcpkg/scripts/buildsystems/vcpkg.cmake",
            "cacheVariables": {
                "CMAKE_BUILD_TYPE": "Release"
            },
            "condition": {
                "type": "equals",
                "lhs": "${hostSystemName}",
                "rhs": "Linux"
            },
            "vendor": {
                "microsoft.com/VisualStudioRemoteSettings/CMake/1.0": {
                    "sourceDir": "$env{HOME}/.vs/$ms{projectDirName}"
                }
            }
        },
        {
            "name": "macos-debug",
            "displayName": "macOS Debug",
            "generator": "Ninja",
            "binaryDir": "${sourceDir}/out/build/${presetName}",
            "installDir": "${sourceDir}/out/install/${presetName}",
            "toolchainFile": "${sourceDir}/tools/vcpkg/scripts/buildsystems/vcpkg.cmake",
            "cacheVariables": {
                "CMAKE_BUILD_TYPE": "Debug"
            },
            "condition": {
                "type": "equals",
                "lhs": "${hostSystemName}",
                "rhs": "Darwin"
            },
            "vendor": {
                "microsoft.com/VisualStudioRemoteSettings/CMake/1.0": {
                    "sourceDir": "$env{HOME}/.vs/$ms{projectDirName}"
                }
            }
        }
    ]
}
The important part here is the "toolchainFile": "${sourceDir}/tools/vcpkg/scripts/buildsystems/vcpkg.cmake", or some alternative using CMAKE_TOOLCHAIN_FILE:
"cacheVariables": {
    "CMAKE_BUILD_TYPE": "Release",
    "CMAKE_TOOLCHAIN_FILE": "${sourceDir}/tools/vcpkg/scripts/buildsystems/vcpkg.cmake"
},
In any case, make sure that the toolchain file vcpkg.cmake exists in the correct path, and that you have setup all basic steps for vcpkg (such as the vcpkg integrate install and the bootstrap part).
Now, we struggle with CMake integration with VCPKG, that unfortunately does not work as expected… So, we do many workarounds on CMakeLists.txt to actually include the vcpkg toolchain (see CMakeLists.txt below):
cmake_minimum_required(VERSION 3.26)

project(demo-manydeps-gmp-project LANGUAGES CXX VERSION 0.0.1)

set(CMAKE_CXX_STANDARD 17)
set(CMAKE_CXX_STANDARD_REQUIRED ON)
set(CMAKE_CXX_EXTENSIONS OFF)
set(CMAKE_EXPORT_COMPILE_COMMANDS ON)

# ===================
# header only library
# -------------------
add_library(manydeps-gmp-lib INTERFACE)
target_include_directories(manydeps-gmp-lib INTERFACE include/)

add_executable(app_demo src/main.cpp)
target_link_libraries(app_demo PRIVATE manydeps-gmp-lib)

#add_library(external_folder INTERFACE)
#target_include_directories(external_folder INTERFACE external/)

if(UNIX)
set(CMAKE_PREFIX_PATH "${CMAKE_SOURCE_DIR}/build/vcpkg_installed/x64-linux")
else() # WINDOWS?
set(CMAKE_PREFIX_PATH "${CMAKE_SOURCE_DIR}/build/vcpkg_installed/x64-windows")
# prepare some future FindGMP.cmake, if necessary!
set(GMP_INCLUDE_DIR "${CMAKE_SOURCE_DIR}/build/vcpkg_installed/x64-windows/include")
set(GMP_LIBRARIES "${CMAKE_SOURCE_DIR}/build/vcpkg_installed/x64-windows/lib/mpir.lib")
endif()

# PkgConfig from vcpkg only working on Linux!

if(UNIX)
find_package(PkgConfig REQUIRED)
pkg_check_modules(gmp REQUIRED IMPORTED_TARGET gmp)
pkg_check_modules(gmpxx REQUIRED IMPORTED_TARGET gmpxx)
#
add_library(gmp::gmp ALIAS PkgConfig::gmp)
add_library(gmp::gmpxx ALIAS PkgConfig::gmpxx)
#
target_link_libraries(app_demo PRIVATE gmp::gmp)
#
else() # WINDOWS?
set(CMAKE_MODULE_PATH "${CMAKE_SOURCE_DIR}/cmake/modules")
set(CMAKE_PREFIX_PATH "${CMAKE_SOURCE_DIR}/cmake/modules")
# invoke FindGMP.cmake
# find_package(GMP REQUIRED)
# message(STATUS "MAIN GMP FOUND!" ${GMP_FOUND})
#
set(VCPKG_WINDOWS "${CMAKE_SOURCE_DIR}/build/vcpkg_installed/x64-windows")
include_directories("${VCPKG_WINDOWS}/include")
link_directories("${VCPKG_WINDOWS}/lib")
#
set(MPIR_LIB_PATH "${VCPKG_WINDOWS}/lib")
target_link_libraries(app_demo PRIVATE "${MPIR_LIB_PATH}/mpir.lib")
endif()
This is very ugly and unfortunate, but pkgconfig only worked (partially) correct on linux. But even on linux, some workarounds were also needed! We could not make this work on MacOS, because vcpkg install didn’t work for gmp (or mpir) for triplet x64-osx.
Regarding pkgconfig and cmake integration, on Linux one can find the files build/vcpkg_installed/x64-linux/lib/pkgconfig/gmp.pc and it seems that these .pc files were missing on windows, so pkgconfig was not working (I’m just guessing here, but make sure these .pc files exist before trying to make pkgconfig automation work!).
To build it with CMake, just perform the classic commands (create a build/ folder and build with preset win-x64-release):
cmake -B build -S . --preset=win-x64-release
cmake --build build --config Release
I found that, in some strange circumstances, the -B build option may not work perfectly, so another alternative is to manually enter the build/ folder and build from there:
mkdir -p build/
(cd build && cmake .. --preset=linux-release)
cmake --build build --config Release
So, now we have a much cleaner way of building, using Bazel.
Demo with Bazel
If you don’t have bazel, it is very easy to it on any operating system by using bazelisk project.
For windows, you can use Chocolatey: choco install bazelisk
For mac, you can use Brew: brew install bazelisk
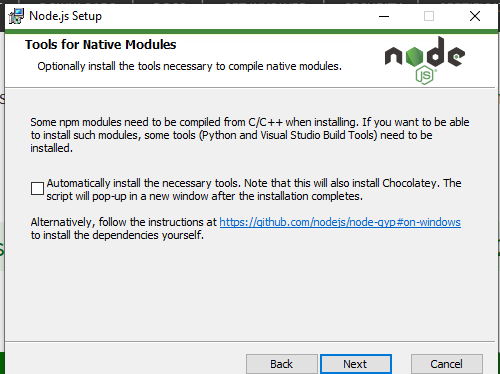
For linux, you can use NPM (that can be installed by NVM):
$ curl -o- https://raw.githubusercontent.com/nvm-sh/nvm/v0.39.5/install.sh | bash
$ bash -i -c "nvm install --lts"
$ bash -i -c "sudo npm install -g @bazel/bazelisk"
It is very easy to setup a project in Bazel, so you just need to create a WORKSPACE file, on the root of your project, and a BUILD.bazel file for each project package.
To import GMP into any other project, I define it as a local_repository called @gmp on WORKSPACE. Since we have two ways of importing GMP package, I make two examples called gmp.BUILD and gmp.vcpkg.BUILD . You can choose which package you want (to build GMP manually onthirdparty/gmp folder or to use vcpkg):
load("@bazel_tools//tools/build_defs/repo:http.bzl", "http_archive")

new_local_repository(
    name = "gmp",
    path = "./thirdparty",
    build_file = "//:gmp.BUILD",
#     path = "./tools/vcpkg/packages",
#     build_file = "//:gmp.vcpkg.BUILD",
)
See gmp.BUILD :
load("@rules_cc//cc:defs.bzl", "cc_binary", "cc_library")

package(
    default_visibility = ["//visibility:public"],
)

# manually build GMP library on thirdparty folder
cc_library(
    name = "lib",
    srcs = select({
        "@bazel_tools//src/conditions:windows": glob(["mpir/lib/**/mpir.lib", "mpir/lib/**/mpirxx.lib"]),
        "@bazel_tools//src/conditions:darwin": glob(["gmp/.libs/**/libgmp*.a", "gmp/.libs/**/libgmp*.dylib"]),
        "//conditions:default": glob(["gmp/.libs/**/libgmp.a", "gmp/.libs/**/libgmpxx.a"]),
    }),
    hdrs = select({
        "@bazel_tools//src/conditions:windows": glob(["mpir/lib/x64/Release/gmp.h", "mpir/lib/x64/Release/gmpxx.h"]),
        "@bazel_tools//src/conditions:darwin": glob(["gmp/gmp.h", "gmp/gmpxx.h"]),
        "//conditions:default": glob(["gmp/gmp.h", "gmp/gmpxx.h"]),
    }),
    includes = select({
        "@bazel_tools//src/conditions:windows": ["mpir/lib/x64/Release/"],
        "@bazel_tools//src/conditions:darwin": ["gmp"],
        "//conditions:default": ["gmp"],
    }),
    visibility = ["//visibility:public"],
    linkstatic = 1
)
See gmp.vcpkg.BUILD :
load("@rules_cc//cc:defs.bzl", "cc_binary", "cc_library")

package(
    default_visibility = ["//visibility:public"],
)

# vcpkg-installed GMP library
cc_library(
    name = "lib",
    srcs = select({
        "@bazel_tools//src/conditions:windows": glob(["mpir_x64-windows-static/lib/**/mpir.lib", "mpir_x64-windows/lib/**/mpirxx.lib"]),
        "@bazel_tools//src/conditions:darwin": glob(["gmp_x64-osx/lib/**/*.a"]),
        "//conditions:default": glob(["gmp_x64-linux/lib/**/*.a"]),
    }),
    hdrs = select({
        "@bazel_tools//src/conditions:windows": glob(["mpir_x64-windows-static/include/**/*.h","mpir_x64-windows/include/**/*.h"]),
        "@bazel_tools//src/conditions:darwin": glob(["gmp_x64-osx/include/**/*.h"]),
        "//conditions:default": glob(["gmp_x64-linux/include/**/*.h"]),
    }),
    includes = select({
        "@bazel_tools//src/conditions:windows": ["mpir_x64-windows-static/include/", "mpir_x64-windows/include/"],
        "@bazel_tools//src/conditions:darwin": ["gmp_x64-osx/include/"],
        "//conditions:default": ["gmp_x64-linux/include/"],
    }),
    visibility = ["//visibility:public"],
    linkstatic = 1
)
In my case, I’m giving preference to the manually built target on my WORKSPACE, but on manydeps/manydeps-gmp project you can find github actions testing every possible combination of them (and all of them work) :)
My demo application is another package (and some other smaller packages that I won’t deeply explain here), but here is some example of a global BUILD package using gmp library for target app_demo (see BUILD.bazel file below):
load("@rules_cc//cc:defs.bzl", "cc_binary", "cc_library")

package(
    default_visibility = ["//visibility:public"],
)

cc_binary(
    name = "app_demo",
    srcs = glob([
        "src/**/*.h",
        "src/**/*.cpp"
    ]),
    deps = ["//include:manydeps-gmp-lib", "@gmp//:lib"]
)
Finally, a very important detail comes last… Remember the many types of Static Libraries in Windows? You need to inform your bazel build the right type of static library, by configuring MSVC compiler and linker parameters on a file named .bazelrc :
common --enable_platform_specific_config
build:windows     --cxxopt=/std:c++17 --cxxopt=/MT --linkopt=/NODEFAULTLIB:MSVCRT --features=static_link_msvcrt
build:linux       --cxxopt=-std=c++17                       --features=fully_static_link
build:linux_gcc   --cxxopt=-std=c++17 --client_env=CC=gcc   --features=fully_static_link
build:linux_clang --cxxopt=-std=c++17 --client_env=CC=clang --features=fully_static_link
The important part here on Windows, since we want to build a /MT static library (by using LIBCMT), we put -cxxopt=/MT --linkopt=/NODEFAULTLIB:MSVCRT --features=static_link_msvcrt
If you want to learn more about these options, take a look at bazel windows toolchain for c++: https://github.com/bazelbuild/bazel/blob/master/tools/cpp/windows_cc_toolchain_config.bzl
Now, we are ready to build the demo on bazel:
- For Windows, just use:
bazel build ... --config windows - For Linux or Mac, just use:
bazel build ... --config linux
You can also force some specific compiler to be used (like GCC or Clang), and on manydeps/manydeps-gmp repo, we also test all of these options to make sure that these work!
Final Remarks
The “simple task” of installing a very popular library in C++ in cross-platform setup (for Windows, Linux and Mac) became a source of knowledge for many tricky things, and certainly took many hours. So, feel free to learn from these advices here, in the same way I’m very grateful to many folks that spent time on many forums to explain every little detail that I’m trying to merge together here. Thanks for reading and thanks for sharing!